"
Showing posts with label Filipino Food. Show all posts

Wednesday, February 7, 2018

Fun Birthday Celebration

My Birthday Celebration 2018


Sweet Hello Everyone!:)

I can't believe that we are on the second month of  year 2018; and realized how long its been since the last time I posted on this blog. It's amazing how time just flies! Anyways, aside from being super busy with kids; which are both very active on their own respective sport choice. I also work more hours now. It's more on time management I guess- I always make sure that my family comes first;  always spend quality time with them. With that being said; As busy as I am right now, I will still find time to do my blog and keep it updated :)
Show me that happy smile guys! and let's get started on my birthday celebration escapades. It's a little late, BUT hey " better late than never" So, here we go.

Birthday is all about celebrating blessed year with your family and friends. If you remembered my Birthday Celebration: Chicago weekend getaway. Click the link HERE. I'm so blessed and grateful that I have awesome family and friends whose always there to make my day an extra special one (not only on my birthday but everyday) Super Thank You to all of you!:)

My birthday celebration started with great breakfast. Yes, I made our delicious breakfast as my treat for my loving family. It was delicious! Then, we headed to Red Velvet Cafe where I choose my birthday cupcakes and favorite bubble tea ( one of my favorite place for cupcakes and bubble tea )


We then decided to have dinner at Bonifacio. Yes, I love Bonifacio! As you may remembered my last year blog post Birthday Celebration: Chicago Weekend Getaway. Such a perfect place for modern Filipino cuisine experience. Yummmo! We had Lumpia Shanghai, Lechon Kawali, Sisig Taco's, delicious drink ( totally forgot the name of it ) and of course Halo-Halo for dessert. Indeed scrumptious!:)

Few days later after my birthday, one of my close friend visited me and brought delicious food, scrumptious cake, and my favorites. Yum!! It was such a treat seeing her. Thank you, Baye:)

That's not all.. my family set up another birthday celebration where we celebrate our birthday's together. It was so awesome!


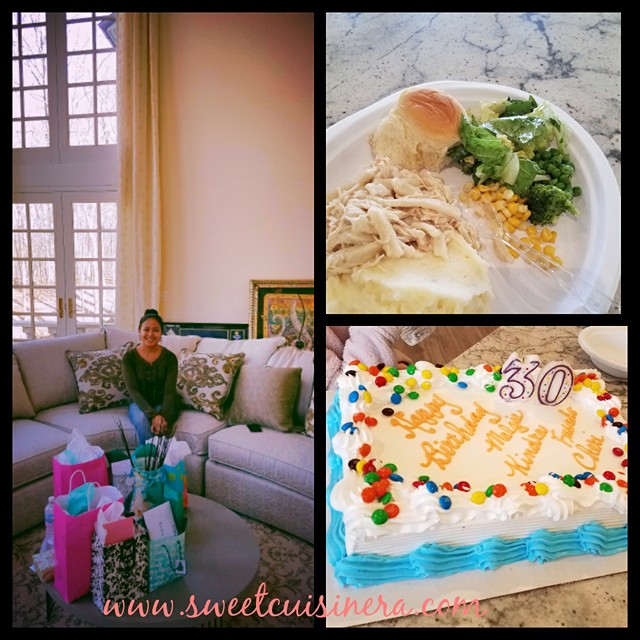
 We all gathered at my sister in-laws house (Sommer's residence) to celebrate my birthday, Kindra (sister in-law) Mom Cheri (mother in-law) and Fusako. We had chicken noodle soup, mashed potatoes, corn, peas, bread, green salad- and ice cream cake. You guess it right!? It was really FUN birthday celebrations.

.. and that's how I celebrated my birthday. Indeed a moment to remember for lifetime! I would like to say "Thank You" to my family and friends for all the love and sweet greetings offline/online, for being so generous, and for making my day a very special one. I LOVE you all! 

I hope you have fun reading my first blog of the year. Keep that sweet SMILE always and stay gorgeous!:) Until next time everyone :)

P.S. Happy Birthday to my beloved cousin Lorlyn :)

xoxo- Melgie

Share the LOVE:)

Thursday, September 8, 2016

Fried Bangus Recipe

Fried Bangus Recipe

( My version of Fried Milkfish Recipe )


Hello Everyone!

I woke up this morning feeling happy and energized! I have fresh brew coffee on hand, kids are eating their breakfast, and I'm preparing one of my favorite breakfast food. O, Yes! Fried Bangus, boiled eggs, fresh tomatoes, over steamy plate of rice sound amazing. Isn't it? This ultimate breakfast experience is absolutely delicious and I simply can't wait to share with you my own version of Fried Bangus. This Fried Bangus recipe is perfect for any occasions and surely impresses everyone. It's cripsy, flavorful, and just perfect. Are you ready for delicious morning experience. Let's get cooking! Shall we?

Notes:
I used  Sarangani Baby Milkfish Marinated Bangus on this recipe ( which is available on many Asian supermarkets)
- Adjust the quantity according to your needs.
- Pair the Fried Bangus with your favorite sawsawan.

Fried Bangus Recipe

Ingredients:
Marinated Baby Milkfish 
Cooking Oil
Pan
Optional:
Sliced Tomatoes
Boiled Eggs
Sawsawan


Cooking Directions: 

1.) In large pan, heat the cooking oil in medium heat. Fry the Milkfish for about 4-5 minutes on each side or until golden brown. I prefer my Bangus little crispy (wink)
Note: Be careful of oil splatter when placing the milkfish onto hot oil. 
2.) Place the Fried Bangus in paper towel to drained excess oil.
3.) Serve with boiled eggs, fresh tomato, sawsawan and steamy place of rice. Yum!


What make this Fried Bangus recipe extra amazing? It doesn't take time to make. Perfect for morning rush and its incredibly delicious. If you love fish especially milkfish this recipe is right for you. I can't explain how I LOVE Fried Bangus-  this is something that reminds me back home, something that I really enjoy eating. It is a part of me (hahaha) 

Next time you craved for something fishy, delicious, crispy, and remind you about Philippines give Fried Bangus a try. Its absolutely delicious! I hope this blog post inspire you for delicious recipe experience. Until next time everyone! Don't forget to SMILE and stay GORGEOUS as always.:)

xoxox- Melgie

Share the LOVE:)

Thursday, June 2, 2016

Easy Mango Cake Recipe

Mango Cake Recipe with Truvia Nectar Blend

#TruFanCommunity #Crowdtap


Hello Everyone!

I'm calling all the Mango lovers out-there to try this super easy scrumptious Mango Cake recipe. I'm extremely excited about this recipe because I LOVE Mango Cake! It is actually one of my favorite and been wanting it for long time. When I made my first Mango Cake the other day, I was so stoked with the results. I couldn't asked for more, it was indeed DELICIOUS cake! Officially, my kids are now Mango Cake fanatic. Awesome right? I hope you guys are all excited as we unfold how easy it is to make this Homemade Mango Cake at the comfort of your own home. Let's get started, shall we? :)

I know you guys are excited to make this Mango Cake. BUT, before we get into baking. Let me give you an overview on some of the ingredients that I used on this recipe. Stared off with the main ingredients.
Mango- I highly recommend to use fresh ripe mangoes on this recipe. In case its not available, I think frozen or can mangoes will work just fine.
Cream Cheese Icing- feel free to use your favorite icing recipe but I prefer store bought.  The last ingredient that I'd like to introduce to you is this amazing  NEW Truvía® Nectar blend  Truvía® Nectar has 50% fewer calories per serving than sugar and adds a touch of sweetness wherever you would use agave, sugar or honey. Blended with Stevie leaf extract and honey. Its reduced-calorie way to love honey. I received this Truvia Nectar Blend for free courtesy from Crowdtap and TruviaCrowd I'm really pleased and happy with this product, its perfect pair that added sweetness into my Mango Cake recipe. Indeed a perfect blend of flavors. Yum! Here we go with the recipe!:)

Note: Make this Mango Cake as your own recipe. Adjust the taste according to your preference!:)

Mango Cake Recipe

Ingredients:
(3) Ripe Mangoes- chopped
1/2 teaspoon Truvia Nectar Blend
Cream Cheese icing
Non-stick cooking spray
(2) round baking pan for double layered cake
(1) 15.25 oz white cake mix
1 cup water
1/2 cup vegetable oil
3 eggs

* Preheat oven to 350 degree Fahrenheit

Mango Creme Filling - to make the mango creme filling. Simply placed the chopped ripped mangoes into a bowl. Add 1/2 teaspoon of Truvia Nectar Blend for sweetness. Stir until thoroughly combine. Set aside.

Cream Cheese Icing with Mango Bits- to make cream cheese mango bits icing is extremely easy. Just simply combine the store bought icing of your choice, add ripped mashed mangoes and stir until combine. Set aside


Directions: 
1.) To make the cake batter. Simply follow the directions on the back of the cake mix. Mix,  1 cup water, 1/2 cup oil, 3 eggs in large bowl with mixer on medium speed or by hand for 2 minutes. Add finely chopped mango into the mix.
2.) Spray the pan with non-stick cooking spray. Pour the cake batter into pan. Bake at 350 degree Fahrenheit preheated oven for 25-30 minutes or until golden brown. Cool for 10 minutes before removing from the pan. Cool completely before frosting.
3.) As you can see on the photo above. I put frosting on the cake before adding the next layer. This will allow the cake to stick  together make it easy for frosting process. I also lay parchment paper on the bottom for easy clean up after I frost the cake.
4.) Make sure that the whole cake is covered with icing. Then, put the Mango Creme filling on the top of the iced cake. Add the remaining icing on the side to secure the Mango Creme filling from falling out to the side.
5.) There you go folks. Enjoy your Homemade Scrumptious Mango Cake with Truvia Nectar Blend. Share this delicious cake to your family and friends. Enjoy!


 Every single bite of this Mango Cake reminds me back home. The Mango flavor is truly the highlight of this delicious treat. Not to mention that the Mango Creme filling on top with Truvia Nectar Blend just add to perfection. This is probably one of the BEST treat ever this week! As you guess, I'll be making more of this Mango Cake soon. Yummmo!!! I hope this recipe inspire you to make your very own Mango Cake at home. Don't forget to share your amazing baking experience on the comment below. Check Truvia Nectar blend at your local stores and grab some mangoes to enjoy this week. Check my other blog Wish4less for fun reviews and Sweet Cuisinera for more delicious treat recipes. Enjoy the rest of the week. Stay gorgeous everyone!


xoxo- Melgie

Disclosure: I received  FREE Truvia Nectar Blend courtesy from Crowdtap and TruviaCrowd Opinions express are 100 percent my own.  Thank you so much #Crowdtap #TruFanCommunity #TruviaCrowd #Sponsored

Share the LOVE:)
 

Monday, February 1, 2016

My Birthday Bash Celebration 2016

My Birthday Celebration Escapade!:)


Sweet Greetings Everyone!
  
You guess it right! Its my birthday bash celebration (excitement overload!)  Since, I started blogging  (4 years ago) I always do a blog post about my birthday celebration ...little late this year though :) As you may all remembered my (last year's birthday). So, this year is no difference. Get that excitement coming because I am taking you with me on my birthday bash birthday escapades. Join me as we celebrate this awesome birthday celebration, where we can experience delicious food recipe, birthday ideas, and all fun stuff. 
Lets start the birthday festivities, shall we? Cheers for another year better! (wink)

..............Celebration with Friends...............
- It so much fun when you have your great friends on your birthday. Devouring delicious Filipino food, wonderful company, glorious gifts, and all fun stuff. My friends made delicious food which are all my favorites, like roasted chicken, eggplant salad, menudo, ginataan na may isda, fish paksiw, spanish bread. Yum! and of course Rose made me a birthday cake (three layered cake) 


.............Birthday Dinner Date with Hubby and Kids........
Hubby know me BEST! He treat me to my favorite steakhouse in celebration of my birthday. I ordered all my favorite drink which is Mango Passion Rita. Followed by Loaded Bake Potato Soup 
(so good!) and the main course which is Steak and Sweet Baked Potato. I also got a free ice cream courtesy from steakhouse (wohoo!) Perfect way to finished up our delicious dinner.
Thank you to my hubby and kids for such a nice birthday treat and for generous birthday gift. (wink)


 ............Join Birthday Celebration with my In-laws..........
Lastly- A join birthday celebration with my beloved in-laws. We had chicken noodles, mashed potatoes, corn, peas, and bread. It was best meal ever! Delicious indeed. Also, my mother in-law made me a chocolate cake with white icing. Scrumptious!
I would like to thank you my in-laws for being so generous, loving and just simply wonderful. I LOVE you all!:)


....... SPA Escape and Lunch with In-laws.....
As part of our join birthday celebration (my sister in-law Tacy) treat us to wonderful SPA Escape and Lunch. We we out (all four of us) with my sister in-law Tacy & Kindra, Mom in-law Cheri and Me. for such amazing SPA escape and followed by scrumptious lunch. I enjoyed my facial experience!
It was great spending time with my wonderful in-laws. Just fantastic day.:)


My birthday was surely a very special and unforgettable. Its something that I will cherished for the rest of my life. I would like to say big Thank You to my lovely family and friends who greeted my via offline and online and making my birthday extra special. I'm truly blessed to be surrounded by wonderful and amazing people in the world. I LOVE you all!:)

And that's how I celebrated my 28th birthday! :)

I'll see you in few days for more fun blog post. Stay wonderful everyone! Don't forget to SMILE :)

xoxoxo- Melgie 

Share the LOVE:) 

Friday, December 11, 2015

Tortang Talong Recipe

Tortang Talong (Eggplant Omelet) Ultimate Breakfast Experience 


Hello Everyone!:)
It's been a super busy week for me and my family. It's holiday season (what can I say?) but, I'm excited that I finally get a chance to sit down and update my blog (wink:)  It's super exciting because its my first blog of the month and two weeks more to go and its Christmas. Yippeee! The recipe that I'll be sharing today is one of my favorite. I made Tortang Talong and It's totally a delicious experience. It gives me inspiration to do some of my Christmas shopping today. It just happen so fast, so quick, but I made progress when it comes to buying gifts. Holiday season is always special and fun to celebrate with family and friends. Let's keep this holiday spirit fun and exciting by making this Ultimate Tortang Talong Recipe. What the best thing I like this recipe? its budget friendly, delicious and totally take you back home.
Join me as we make my version of  Tortang Talong Recipe ( Eggplant Omelet). I'll promise you! This is going to be delicious. Let's go.:)

 
Notes: Adjust the quantity of the ingredients for larger crowd. Enjoy!

Tortang Talong Ingredients:

2-3 Chinese Eggplant cooked
2 Large Eggs
1 medium size onion chopped
1 tomato chopped
Salt and Pepper- to taste
Cooking Oil

Directions:
 1. First, cooked the eggplant by either grilling or boiling process. In this recipe, I choose to cooked the eggplant by letting it sit in a boiling water for about 5-8 minutes. Took the eggplant out in a boiling water. Set aside.
2. While waiting for my eggplant to cool down. I chopped tomatoe, onion, and  beaten the two eggs in a separate bowl.
3. Grab the cooked eggplant. Make sure you retain the crown and the stem of the eggplant. Gently flatten the eggplant meat by using fork.
4. Put3-4 tsp oil in large non-stick skillet.Combine the beaten eggs, chopped onion and tomato, salt and pepper. Then, dip the eggplant into the egg mixture and slowly put it on the hot skillet. I add more egg mixture on the eggplant and make sure that it well distributed.
5. Fry until golden brown on one side, then turn and brown the other side. Drain on paper towel.
6. Serve hot and Enjoy!


 ( My Ultimate Tortang Talong Breakfast Feast..wink: )

I'm so proud that I finally made my ultimate Tortang Talong Breakfast Feast! I know its look a lot but when your craving for something that you wanted for so long. It just a rewarding feeling and I truly enjoyed my breakfast, every single bite of it. Yummo! I love my Tortang Talong paired with tuyo and of course my favorite drink. 
Tortang Talong is definitely one of my favorite Filipino food. Its budget friendly, delicious, and super easy to make. It has all the components of a perfect bite. Do you agree? 
I hope you enjoyed this very tasty adventure with me today. I'll see you in few days for more fun recipes and foodie escapades.  Stay gorgeous and smile a lot! :)

Enjoy your holiday shopping :)

xoxox- 

Share the LOVE:)

Thursday, November 19, 2015

Foodtrip: My Favorite Food Collections

My Favorite Food Collections

Hello Everyone!

Today, I'm taking you to for an ultimate food trip. Yes! I'll be sharing my ultimate favorite food, recipes, and foodie escapades. This is just basically a collections summary of my ultimate favorite food. I started blogging back in 2012, since then, I know that my blog is all about my love for food. And sharing that love for food through my blog felt amazing. It's not only that I learned from my fellow bloggers, readers, but also able to learn new recipes and experience new things. Its always fun experimenting food. Do you agree? I remember the first time I received my first cookbook, my first baking experience, and first time trying new recipe. Let me tell you! Its not always a success. I failed so many times but the FUN part was the experience. Its give me motivation to keep me going until I got it right. Moving on... Are you ready to explore my ultimate favorite food? I hope your excited because I'm taking you with me.
I have way to many favorites. Its hard to choose just few, So, I'm giving my long list of my favorites. I'll promise you! this is going to be fun and delicious food-trip ever.  By the way, I made all the recipes mention on this blog post. If you want to make some at home or a copy of the recipe, just click on the link that I attached on every recipe. Enjoy!

Let's get start our tasty journey! :)


Kamote Que is deef fried sweet potatoes covered with caramelized brown sugar.  It's one of my favorite because its easy to make, affordable, delicious, and it reminds me back home. Delicious! I'm thinking having this later today. Yum! For recipe check the link HERE.


Shakoy or well known as Twisted Donuts covered with sugar is also one of my favorite because its simply delicious. It reminds me of my Grandma who used to make Shakoy every weekend. Totally love this food. Click HERE for recipe.

Binangkal- is basically fried sweet dough with sesame seeds. This is for sure my ultimate snacks! I love how simple it is and its delicious. If you want to make it at home, just click HERE for the recipe.


Monggo Bread ( Pan de Monggo) is for sure my favorite bread of all time. It has the combination of my two favorite ingredients. Monggo beans and sweet soft bread. This is really something that I would make every now and then.. So delicious! For recipe just click HERE.


Chicken Empanada- is  combination of sweet flaky pastry with chicken filling. Its a perfect meal indeed. Its super easy to make and tasty. Yum! For Empanada recipe just click HERE.


Crispy Fried Chicken- a homemade fried chicken that taste so good is fantastic! This is actually my family's favorite and its so good paired with white rice and homemade gravy. Yum! For super easy recipe please click HERE


 Suman Malagkit- This remind me so much back home! The sweet sticky rice wrapped with banana leaves and cooked to perfection. So good! For recipe just click HERE


 BIKO- this Filipino delicacy is amazingly delicious. It made with sticky sweet rice with caramel sauce. I'm a big fan of BIKO for sure! Its something that I eat once a month. Yummo! For recipe please click HERE.


 Butsi - is something that I crave from time to time and one of my favorite. This little goodies is delicious. Its soft dough with sweet coconut filling inside and covered with sugar. Yum! For recipe click HERE.

TAHO- this is simply good. Its made with tofu, tapioca, and drizzle with caramel sauce. This is great for merienda! For recipe please click HERE.

I hope this food favorites of my mine will inspires you to make one soon. Which one is your favorite or favorites? Leave me a comment below. I hope you enjoy our tasty food-trip experience today. See you in few days everyone! Have a great and gorgeous day ahead.:)


Share the LOVE:)


Wednesday, May 6, 2015

Quick and Fun Party Ideas

Pacquiao VS Mayweather Fight Mini Party


Hello Everyone!
How are you all doing today? I know its been awhile since the last time I blog. I was super busy in past couple weeks and my allergies is kicking me out badly. I feel a little better now though (wink)
Anyways, I'm sure most of you watched the fight of the century the "Mayweather vs Pacquiao's" fight and of course being a huge fan of Manny Pacquiao, I hosted a little party for me and my friends. It was so much watching the fight and of course hanging out with each other. Join me as we discover few party ideas and food recipes for this most awaited fight of all time. Yippee!:)

Let's get is ON!
Start it off with DRINKS, Silverware and Snacks
-  I like to have a varieties of drinks from bottled water, tea, different kind of soda's and of course alcoholic drink that includes beer, margarita's and what not.
- In this party I mostly used paper plates, plastic cups,plastic forks and spoon for easy clean up. .
- Then, a lot of SNACKS- and that includes my favorite back home which is Chippy and Piattos and of course the classic snack chips and dip. Yum!


Food Ideas!
- We had Pizza galore. Yes! I mean 6-7 boxes of pizza's. We also have rice, dried fish, milkfish, mung bean stew, green beans and adobo.
- For our dessert we have german chocolate cake, binangkal and cassava cake.

My friends brought some food to share which makes it so much easier and fun! For more food recipes check out My Favorite Recipe Collections, Bread and Pastry Confections, No Bake merienda, Product Reviews with few recipes featured.


Feeling the MOMENT!

-After our dinner, the fight begun and it was like a roller coaster of emotions. At least for me, I was so nervous the whole time. We were screaming and cheering the whole time and before we knew it..its OVER!


 The pay per view was so expensive and I felt like its not worthed for 30 minutes running around, threw few punches here and there, and hugs galore. The excitement lasted only for few minutes, until I realized that they're doing same thing over and over again run, punch and hugs.
Win or loss- I'm still so proud of Manny Pacquiao and in my heart his truly the champion.
and to all my friends who came over and joined the fun. (Thank you so much ) Do you think that the re-match will happen? Share me your thoughts about the fight. I' d love to know :)

Cheers everyone and I'll see you in few days for more scrumptious recipes and more. Have a great day! smile a lot and stay gorgeous!

xoxox- Melgie

Share the LOVE:)

Wednesday, April 8, 2015

Grilling: Chicken Barbecue Recipe

 Super Easy Chicken Barbecue Recipe


Hello Everyone!
I'm back again with another delectable chicken barbecue recipe. Yes! this is my second time posting chicken barbecue recipe, as you may all remembered my last blog post HERE. This time around, I used chicken thighs instead of chicken breast. I found this recipe closer to Filipino Chicken Barbecue that I been craving for days now. Huh? Finally! I got a little taste of Pinas right in my kitchen. Yum!
I really intend to chopped the chicken little smaller to copy that Filipino chicken barbecue that I used to and its really good.

Talking about marinade, its really simple and easy- Just mix all the ingredients listed below, marinate the chicken overnight and whoala!! Delectable dinner is waiting for you and your family. This Chicken barbecue is also perfect food for any occasion, couldn't be more perfect for summer grilling season. I'll surely grill more chicken barbecue's very soon!
I'm really excited when it comes to grilling! Can you tell? hehehe! I just love grilled food, the smell, the smoky flavor and the gatherings, which I think is so much fun.
You guys need to have this super easy Chicken Barbecue very soon. Come on! join me as we grill this scrumptious chicken barbecue. Yum!


Ingredients:
6-7 boneless skinless chicken thighs - chopped into bite size pieces
1/2 cup soy sauce
1/2 cup ketchup
1 lemon
1 onion- finely chopped
2 clove garlic- finely chopped
1/4 cup sprite or 2 teaspoon sugar (optional)
salt and pepper- to taste
Bamboo skewers
Barbecue Sauce: I mix half ketchup into 1/4 soy sauce and mix them well. You can also used your favorite barbecue sauce if you want. Enjoy!
 Directions:
1.) Prepare all the ingredients by chopping the onion, garlic and the chicken. 
2.) In large container just combine the soy sauce, ketchup, lemon juice , salt and pepper. The sprite is optional but it add flavor to the dish I highly recommend to add it to the mixture but if you don't feel comfortable with sprite, a little sugar will do.:)
3.) Combine the chicken,onion, garlic and the marinade sauce. Let it set for couple hours before grilling. I do mine overnight..:)
4.) Turn on the Griddler or Grill. Meantime, skew the chicken into the bamboo skewers until everything is done.
5.) Start grilling the chicken barbeque. Brush little marinade if you have to. It would take couple minutes on each side and.. DONE!
6.) Enjoy the chicken barbeque with your family and friends..:)
( My Dinner Plate)

Dinner is serve right on time with white rice and mix vegetables on the side. I truly enjoy this scrumptious chicken barbecue. It bring me closer to home and its super fun to eat. As you guess, my kids love eating chicken barbecue and been asking to have this for dinner for couple days now. I will definetly making more of this summer.
Do you have a favorite barbecue marinade? or maybe a barbecue sauce? I'd like to know your secret for the best barbecue ever! As food enthusiast, finding new recipe is always feel great. So, feel free to leave some sweet comments below. I hope this recipe inspires you in so many ways, I'll see you in few days for more awesome food recipes. Have a great day everyone! Don't forget to grab some chicken barbecue! wink:)

xoxox- Melgie

Share the LOVE:)

Tuesday, February 10, 2015

Chicken Chicharon Recipe

Chicken Chicharon Recipe

(Fried Chicken Skin) 


Hello Everyone!
I'm so excited to share with you all my very own HOMEMADE Chicken Chicharon- Wohoo! I felt like I accomplished something so big (hahahha) I just get so excited having Chicken Chicharon in front me and it taste just like what I have back home. I'm such a big fan of Chicharon wether its pork,chicken or beef- they are all delicious and addicting.
This snack is such a guilty pleasure because we all know that its not good for us BUT the good news is- it won't hurt you if you only eat Chicharon in moderation. That's basically what I did just enough to satisfy my cravings!(hahaha) And to make the whole experience fun invite your friends to come over and have Chicharon for lunch! or maybe cook Chicharon together and remembering all those fun moments:)
Have I told you that making Chicharon is easy as pie? Oh yeah! easy peasy and it only require 3 ingredients. Hello! that is amazingly good right? So, are you excited to make your very own homemade Chicharon? Come on and don't forget to invite your friends and have FUN cooking!


Ingredients:
Chicken Skin- cut into pieces
Salt n Pepper- to taste
Cooking Oil-

Sauce (Optional)- Adjust the taste according to your preference.
1/2 cup soy sauce
1/4 cup vinegar
1 small red onion
1 medium size tomato
Ginger- thinly sliced
- Combine all the ingredients above and serve it along with your very own homemade Chicharon.

Directions:
1.) Put little salt and pepper into the chicken skin. Set aside.
2.) Pour decent amount of oil in medium size pan. (If you do have a deep fryer then that would work too:) Let it heat through maybe about 15-20 minutes medium heat.
3.) Once the oil is hot. Slowly add the chicken skin cutlets. Let it fry until its golden brown and crispy. (Be careful of splashing oil) Check the Chicharon every once in awhile and make sure the every part of the skin is covered with oil.
4.) Once the Chicharon is cooked. Lay them out in paper towel to drain excess oil.
5.) Serve HOT or COLD along with your favorite sauce and rice (wink)
Enjoy your very own homemade Chicharon. Its also perfect for snacks with friends!:)


I promise you! It won't hurt you if you eat Chicharon once in awhile and its DELISH! I can't help myself going back for more..(hahahha) Its addicting, crunchy, and super yummy! Definitely took me back in Pinas. I'm so proud that I finally make my first Chicken Chicharon and I hope you enjoy this recipe as much as I do. I'll see you in few days for more scrumptious recipes and stay gorgeous everyone!

xoxo- Melgie

Share the LOVE:)


Tuesday, January 27, 2015

Birthday Bash Celebration

My Birthday Celebration! :)


Hello Everyone!

When I started blogging (3 years ago) Its kinda like a tradition that I posted my birthday celebration every year. As you may all remembered my 26th birthday and 25th birthday. So, this year is no different, As I am super excited to share with you all how my birthday went. I'm also be sharing some delicious recipes and ideas that you might want to try on your special day.
 Let's raise our glass and Cheers for another year older (hahaha) Come on! Let's start the birthday food fest!

....Celebration with Lovely Friends....
My birthday celebration started when my friends came over to my house and surprise ME with this delicious food and everything FESTIVE! I have too many pictures on food, that I just selected few to share here on my blog ( foodie lover!) We had Fish Paksiw, Fried Red Snapper, Bolinao, Chicken Adobo, Beef Steak, Binangkal, Cassava Cake, Lemon Pudding, Pansit Bihon & Chocolate Chip Cookies ( takaw ko talaga! hahaha)
I'm so amazed and surprised when my friend Rose made me a tower of delicious cupcake and Red Velvet Cake- it was scrumptious! I can't even believe that I still have room for dessert after pigging out those food mention above. (wink!)
We dance, sing and talked for hours. It was so much FUN!


 .... Dinner Night Out....
My kids gave me a birthday card and hubby as always is super sweet! Saturday, we went out for Double Birthday Dinner Date with my friend Cherry and her hubby @ Old Bag of Nails. I ordered Blackened Cod Fillet with Wild Rice and Broccoli, Hubby got Buffalo Wrap which I think its pretty good. My friend Cherry got Burger ( It was gigantic!) and Matt ( Cherry's hubby) for Fish and Fries. The dinner was pretty good! Then, we continued the celebration and decided to go BOWLING all night!


..... Triple Birthday Celebration with my beloved family....
 I celebrated my birthday with my beloved sister in-law (Kindra) and my mother in-law (Cheri)-It was so fun, festive and amazing! We had the legendary stuff shells ( oh yeah! its scrumptious) Salad, corn and rolls. My mother in-law (Cheri ) made me a chocolate cake with white icing ( which is my favorite. Yum!) and super fun and cute cupcakes. Kindra had yellow cake with chocolate icing and Mom Cheri had a German Chocolate cake. Just imagine yourself surrounded with this sweet treat, not to mention chocolate mint ice cream is within reach.:)


....Fabulous Birthday Gift...

"Best gift ever is my family and my friends whose always there for me. Thank you all for making my birthday GREAT and FUN as always" I love you all!..:)


I can't put into words how thankful I am for having great family and friends and for making my birthday an extra special one, for being so generous as always, for making my birthday as fun as it can be. To all who greeted me offline and online " Thank You" and Cheers!
I hope you enjoy the recipe that I posted here and I'll see you in few days for more fun foodie escapades and recipes. Have great day!

- Sweet Birthday Shoutout to my cousin Lorlyn- Happy Birthday Dai, wishing you all the best in life. Miss you!


xoxox- Melgie

Share the LOVE!:)

Thursday, November 20, 2014

Buko Pie Recipe

Simply Homemade -Buko Pie Recipe


Sweet Morning Everyone!

 How you guys doing? It's been a hectic and cold week for me! Yup- its already snowing here in my place! I love the snow but not really liking the cold though. It's been like 3 weeks since my last blog post and I missed you all! Anyways! Whose excited for some Buko Pie?? It's been like forever since I had my last sliced of  this Filipino delicacy, Can you tell?. So, I challenge myself to make some Buko Pie-- and it went perfect! I felt nervous at first but after I made the Pie filling I'm just on it! Wohoo! I'm just so happy that the pie turned out good and its delicious!  I promise:)
On this recipe I used frozen young coconut meat that I bought from Asian store. I would recommend to used fresh coconut if you have some (can't beat fresh coconut meat and buko juice on this recipe). I also made a  homemade pie crust for top layer of the pie but you can totally grab some at the store all ready for you. This Buko Pie reminds me back home! A perfect treat anytime of the day. I can't wait to share my first buko pie experience with you all. I'm getting excited just by writing about this recipe (hahah) I hope you too! Are you ready to make some Buko Pie? Come on join me in my kitchen as we unfold the process on how to make delicious Buko Pie Homemade!
Check out the recipe below! Enjoy:)


 Notes: Store bought pie crust is good for easy cooking. If want to make your own pie crust. I got a recipe for you below that I used for the top layer of the pie. Just double the recipe if you decide to make the bottom and the top layer of the crust.
-Adjust the cooking time if you have to,:)

Ingredients:
Buko Pie Filling :
1 (16oz) Frozen young coconut meat- thawned
3/4 cup sugar
1/2 cup cornstarch diluted in 1/2 cup young coconut water
1/2 cup milk
Frozen Pie Crust- store bought

Butter flaky Pie Crust
1 1/4 All purpose flour
1/2 teaspoon salt
1/2 cup butter- chopped
1/4 cup Ice cold water or 1/4 cup 7up or Sprite soda


Directions:
First let's start make the filling:
1.) In medium pan. Heat up the milk. Add the sugar and stir well.
2.) Meantime, combine the cornstarch and coconut juice- set aside.
3.) Once the milk boils. Add the coconut meat include the juice and let it cook for 3-5 minutes.
4.) Add the diluted cornstarch and stir to avoid lumps.
5.) Keep stirring until the pie filling is cooked. Turn off the heat and cool down.

Pie Crust:
1.) In large bowl combine the flour, salt, chopped butter. Mix the mixture.
2.) Add the water or lime soda and mix well. Put the dough in the baggie and keep it refrigerated until you ready to used it.
3.) Sprinkle little flour on the board, roll the dough until you achieve the right thickness.
4.) Covered your buko pie with your homemade pie crust. Trim the side, used fork to seal the edge of the pie and for cute decoration on the side as well.
5.) Poke the pie on the middle and on the side. Brush with egg-wash to achieve that golden brown color.

BAKE at 375 preheated oven for 40-45 minutes

Enjoy!!


This Buko Pie reminds me back home. I would say very close to what I used to eat back in Pinas. The buko pie filling is not to sweet, perfect blend with coconut meat paired with flaky crust. Perfection!  My kids love this pie and so do I ( Shhhh! I already have 2 slice since I woke up..wink! ) Let me tell you something! this Buko Pie is great with your coffee or hot chocolate in the morning. Yum!  Since holiday is right around the corner, what about a perfect gift for friends and family? BUKO PIE! this is also great pasalubong or even for potluck parties.I hope this recipe gives you an inspiration for upcoming holidays. Share your cooking experience on the comments below! I'll see you in few days for another awesome recipes! Stay warm and smile a lot!:)

xoxox- Melgie

Share the LOVE!

Thursday, October 30, 2014

Leche Flan Recipe

Leche Flan/ Caramel Custard Recipe


Sweet Morning everyone!
Excitement overload!!because we are going to do trick-or treating today. My kids are been waiting for this day- we are literally counting the hours right now hahaha!wohoo! I'm excited for my kids! Talking about excitement. How about a super easy Leche Flan recipe? oh yeah! I finally posted Leche Flan recipe after almost 3 years of blogging- As you may all know, This is one of my favorite dessert next to macaroni salad and mango float. I remembered all those sweet memories with my family back home, eating and sharing Leche Flan every weekend, So, this recipe is special to me-:) To be honest, I was kinda intimidate to make Leche Flan at first, but when my craving strike. I decided to make it right there and then, so spontaneous. It also a good recipe idea if you have a lot of eggs on your fridge,  although we only need the eggyolk on this recipe, you could used the egg whites to make Pasencia Cookie which is also, by the way sooo delicious! or maybe a ham and egg white sandwich in the morning? Yum!
This recipe really work for 4 individual serving and came out just perfect! I would recommend to double the quantity for larger crowd. I love to make extra for myself for personal consumption purposes..wink:)-- It's also really good toppings for  HALO-HALO as well. Do you agree? I'm like drooling right now.. hahaha! Are you excited and ready to make some Leche Flan?  Come on! join me in my kitchen as we unfold my Leche Flan foodie escapade. I'll promise you! this is a super delicious journey!:)


Notes: This recipe is good for 4 individual serving. Adjust the quantity for larger crowd. Make sure that you stir the custard mixture gently to avoid air pockets on the flan ( which I didn't do on this recipe..ooops! for future reference ) Enjoy!

Ingredients:
6 Egg yolk
1 can evaporated milk
1 can condensed milk
1 teaspoon vanilla

1/4- 1/2 cup granulated sugar- caramel sauce
4 ceramic bowls/ flan molder- used whatever you have in hand.:)


Directions:

1.) In large bowl combine the egg yolk, condensed milk, evaporated milk and vanilla. Mix well until everything combine. Set aside.
Note: Mix the mixture gently to avoid bubbles on your flan.
2.)  Time to make the caramel mixture. Simply put the granulated sugar in pan, turn heat into medium low. Let the sugar melt and caramelized to perfection. Turn off the heat and we are ready to assemble our delicious flan.
 3.) Line up the ceramic bowl,  add 1-2 teaspoon of caramel sauce depending on sweet you want it to be. Pour the custard mixture evenly.
Notes: I did steaming process and Baking process. Both came out just perfect! I would personally love the baking process because I can fit all four ceramic bowls at one time. 
 4.) If you do BAKE your Leche Flan- Preheat the oven into 350 and bake for one hour. Make sure that the Leche Flan is bake with water bath. The warm water should be halfway full with the ceramic bowls.
5.) If you do STEAM- I used rice cooker on this recipe and its perfect! I did steam mine for good 1 hour.
6.) Let it cool down completely. Served the Leche Flan upside down. ENJOY!

My family love Leche Flan! and I hope yours too. They are super easy to make and so delicious! A perfect sweet treat for company coming over or just simply a treat on an ordinary day. I hope you find this recipe so scrumptious and try to make it at home.
Warning!!! This dessert is so addicting- wink!:) Share your love on this recipe by dropping a comment below.  I'll see you in few days for more awesome, delicious recipes. Keep it sweet and simple. Enjoy the rest of the day everyone!

xoxox- Melgie

Share the LOVE!

Related Posts Plugin for WordPress, Blogger...
CupcakeStrawberry On Top Of CupcakePumpkinSanta Claus WalkingSanta Claus WalkingCoca-Cola